


We’ll use Python and the Cloud9 IDE to create and add items to a DynamoDB table in just four simple steps!
We’ll use Python and the Cloud9 IDE to create and add items to a DynamoDB table in just four simple steps!

So, I don’t actually have a joke about Cloud9 or DynamoDB, but here’s a fun Python joke for you. Python people — enjoy!
A guy walks into a bar and asks for 1.4 root beers. The bartender says “I’ll have to charge you extra. That’s a root beer float”. The guy says “In that case, better make it a double.”
A LITTLE BACKSTORY:
What’s not a joke, however, is how you can use these three powerful tools together to make awesome stuff.
Let’s talk about Python! Python is a high-level programming language used as a support language for build control and management, testing, website development, task automation, data analysis and visualization, just to name a few. It is widely considered one of the easiest programming languages for beginners to learn. It’s simple, easy-to-learn syntax emphasizes readability. It’s powerful, smart, and compatible with major platforms and systems.
Next up…Cloud9. Cloud9 is a cloud-based integrated development environment (IDE) that lets you write, run, and debug your code with just a browser. It is an AWS service that offers a rich code-editing experience with support for several programming and runtime debuggers, and a built-in terminal. It’s pretty sweet and easy to use.
And last up, DynamoDB. DynamoDB is a fully managed NoSQL database service in AWS, where you are able to store data, add data, and retrieve data. It’s a fast and high-performing database that offers scalability and encryption at rest, along with many other features.
Let’s put it all together and get a database created, shall we?
MUST-HAVES
All you’ll need for this project is an AWS account with the right permissions to access the Cloud9 and DynamoDB services.
STEP 1 — CREATE AN ENVIRONMENT
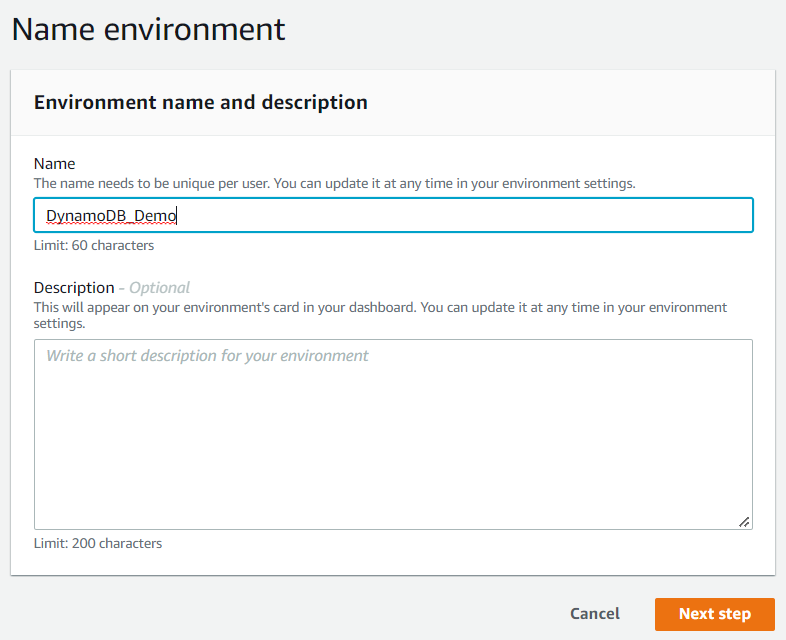
The first step will be to create an environment in Cloud9. We’ll navigate to the Cloud9 service in our AWS counsel. We’ll select Create environment, then we will name our environment, give it a description if we want to, and click on Next step.
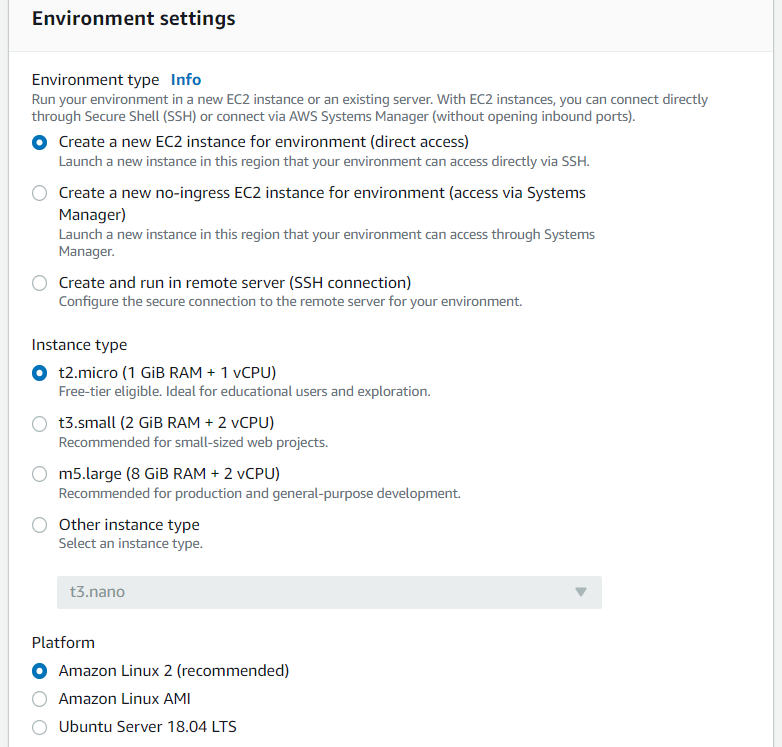
We’ll leave all the other settings on the next screen and select Next step and then Create environment.
After a few minutes, your environment will be set up and you can start working to create your database.
STEP 2 — INSTALL BOTO3
We will be using Python scripts to create our table and add items to it, so we’ll need to install Boto3. Boto3 is an SDK from AWS that will allow us to directly create, update, and delete AWS resources from our Python scripts.
To install Boto3 on our EC2 instance within Cloud9, we will use the following command:
pip install boto3
Successful installation will look like this.

STEP 2 — CREATE YOUR DATABASE
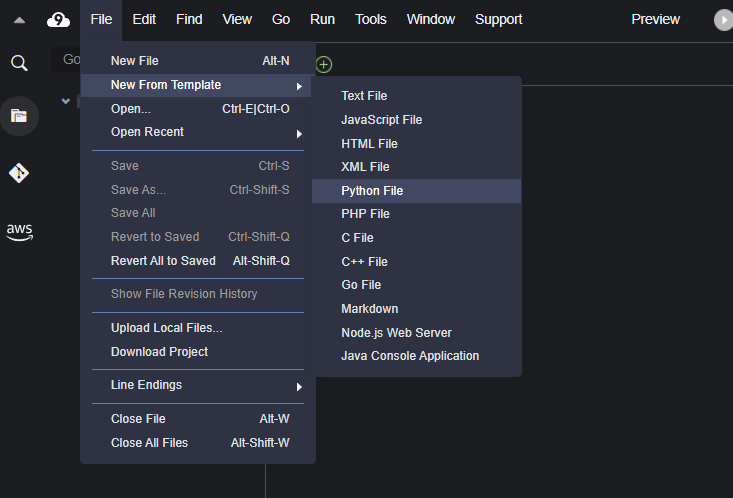
With Boto3 installed, we can now create this database. Our first step will be to create a file. We’ll head to file, then New From Template, and then Python file.
After our file has been created we can start writing our code. In this code, we will give our database a table name, and add both the partition key and the sort key. We will also include our read and write capacity units.
You’ll notice that the partition key will be a HASH key type and the sort key will be a RANGE key type. The partition key and the sort key, make up what is called the composite primary key. All items with the same partition key value are stored together, in sorted order by the sort key value.
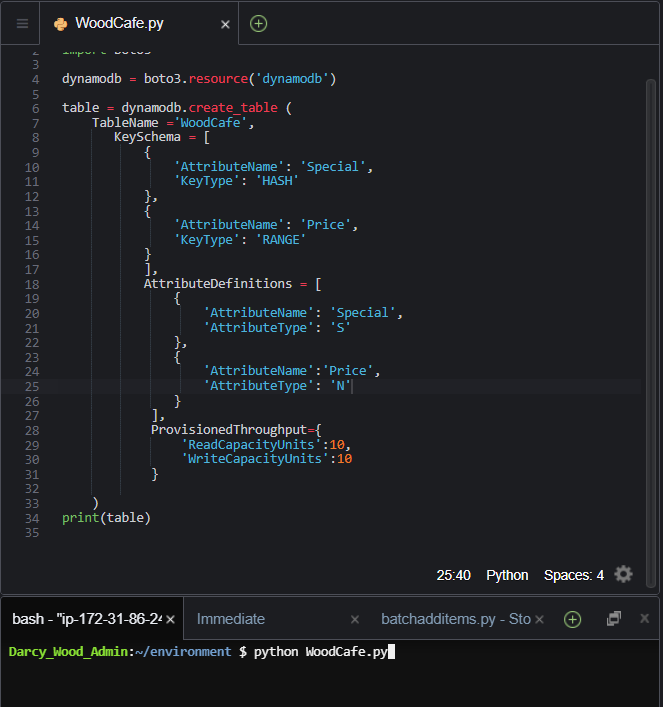
Here is the code I used to create a database in DynamoDB. I’m making a database for café items. My “Special” attribute is a string so I’ll indicate “S” and my “Price” attribute is a number so I’ll indicate that with an “N”.
If you’d like, you can head over to my GitHub and copy the code.
https://github.com/darcyjwood/Python_Catch_All/blob/main/dynamodbcreation
You’ll just need to make adjustments to your TableName, AttributeNames, and AttributeTypes.
After your code has been created we’ll go to File, then Save As, and name our file. Don’t forget to use .py as the extension to your file, since we are using Python.
In our terminal at the bottom of the screen, we’ll type a command to run our file and set up the table. When you run a similar command, you’ll want to use your own file name in place of mine. I used my file name here “WoodCafe.py”. Here’s what the command looked like:
python WoodCafe.py
You can then head over to the DynamoDB services and see your newly created table!

But the fun has only begun. We have to add some items to our database. Let’s do that now.
STEP 4— ADD ITEMS TO YOUR DATABASE
We will head back to Cloud9 and make another file that will write items to our newly created database. Here is the code I used that will add in both the partition and the sort key for one item.

After you save your file, run this code in the terminal:
python dynamodb-boto-insert-item.py
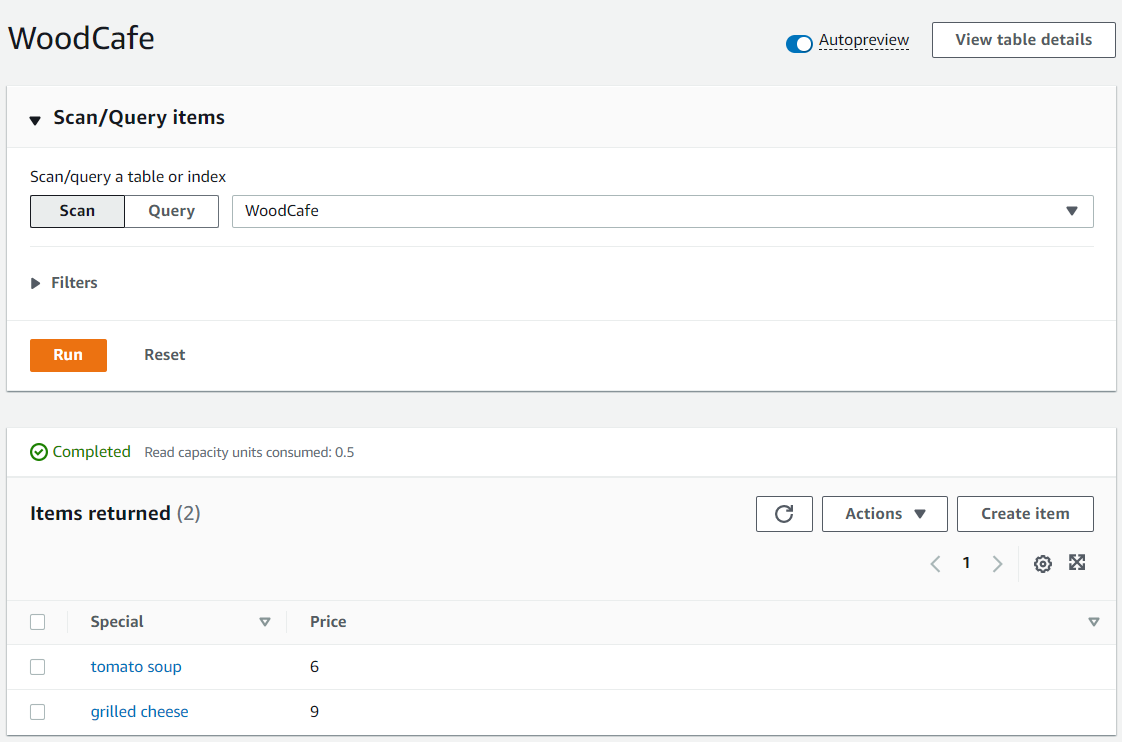
Again, you’ll want to replace your own file name in this command. After we run this command and see that we’ve had success with our code and our commands we can head back over to DynamoDB. Here, you can select your table by clicking on its link and you’ll see your items displayed.
Ya’ll we did it! We used the AWS IDE, Cloud9, and Python scripts to create a database in DynamoDB. Think of all the ways we can use what we learned. Python is powerful and useful and when you couple it with services from AWS, your options are endless.
Thanks for reading and following along. I appreciate your support and always welcome feedback on how to make processes better. Let’s connect!
All the best,
D.
Share with your friends and followers
Start blogging about your favorite technologies, reach more readers and earn rewards!
Join other developers and claim your FAUN account now!


User Popularity
57
Influence
6k
Total Hits
3
Posts

Read, Learn, Know, Teach
Hand curated newsletters for Developers, private Slack with like minded people, podcasts, job offers, news and more!

Only registered users can post comments. Please, login or signup.