Join us
@m3rryqold ・ Sep 12,2022 ・ 7 min read・ 3k views


Introduction
In this article, we will learn how to easily set up Argo CD as an app of apps with Helm, deploy applications with Argo CD and subsequently manage these applications.
Outline
Argo CD? Helm? What are these things?
Argo CD
Argo CD is a declarative, GitOps continuous delivery tool for Kubernetes.
We need Argo CD because application definitions, configurations, and environments should be declarative and version controlled. Application deployment and lifecycle management should be automated, auditable, and easy to understand.
Helm
Helm helps you manage Kubernetes applications — Helm Charts help you define, install, and upgrade even the most complex Kubernetes application.
Charts are easy to create, version, share, and publish. In this tutorial, we are mostly re-using existing charts (including one of ours). To learn how to build and publish your own charts to GitHub pages, you can check out this article.
Now we know them, what do we want to do with them?
We want to set up Argo CD on our Kubernetes cluster, and then use it to deploy other applications following the steps below:
Creating a Kubernetes Cluster (on GKE)
If you are using the Google Cloud Platform (GCP), you can follow the instructions below to set up your Kubernetes cluster, otherwise, check out how to for AWS or Azure.
Login
Configure project info
Create a cluster (autopilot in this case)
The cluster name here is ‘demo-cluster’, in the ‘us-west1' region, and the project is ‘dev-workloads.
You can log in to your cloud console environment to see the progress of the deployment.

Creating a Kubernetes cluster on GKE using CLI

Created cluster
Note: The cluster can also be created using the cloud environment’s UI (but where’s the fun in that?).
Deploy Argo CD to our Kubernetes cluster
Connect to demo-cluster

Connect to the cluster
Install ArgoCD using its Helm Chart
Typically, we would install ArgoCD by applying its manifest and following other instructions here, but instead, we’ll use Helm to install ArgoCD because we love Helm and it makes our lives super easier (check out why in the Helm section above).
Add Argo CD Helm repository

Add Argo CD Helm repository
Install Argo CD

Install Argo CD
You can add the ‘— create-namespace’ flag and ‘-n <namespace>’ to install Argo CD in a new namespace or ‘-n <namespace>’ to do so in an existing namespace.
Confirm installation

Confirm ArgoCD installation
Expose the service
By default, the Argo CD API server is not exposed with an external IP. To access the API server, we can use change our server service to a load balancer, use an Ingress, or simply port forward. They all have their strengths and weaknesses (you can check them out).In this tutorial, we will be changing our service to a load balancer.
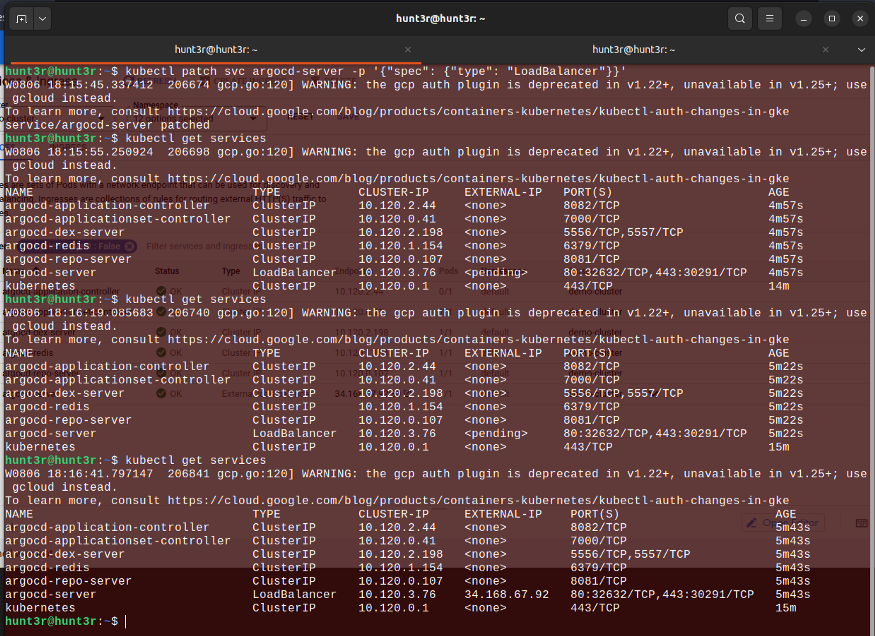
Change argocd-server to a load balancer
Now we can visit the external IP to see ArgoCD’s pretty landing page.
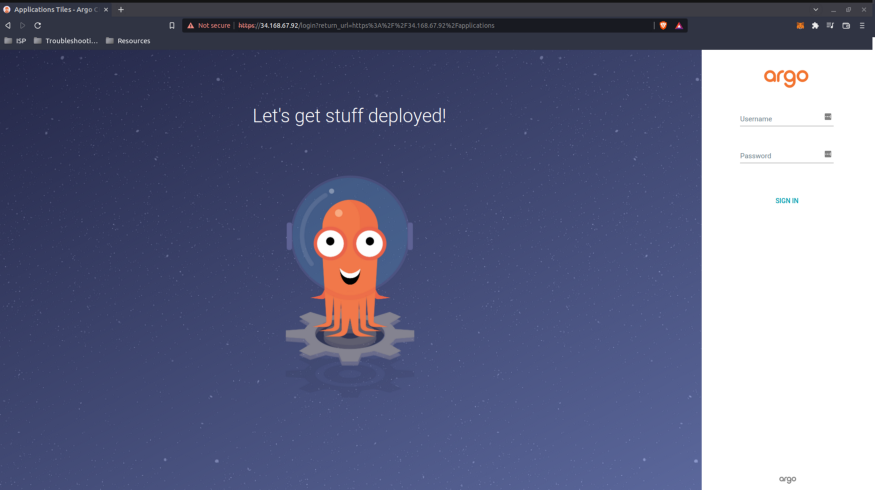
Argo CD UI login page
Login to Argo CD
Fetch ArgoCD’s default password and login (username is ‘admin’).

Application page
Connect ArgoCD to our Git repository
We’ll set up a git repository on Github and point our Argo CD configuration to a directory/folder in this repo. The orientation here is that, for the sake of maintainability, we can add manifests to this directory and Argo CD will automatically deploy these apps.
Picture it this way, we add a root application resource, and every other app is a child of this app. The root application will generate manifests for other applications, ArgoCD will watch this application and synchronize any application generated by it (Don’t think about it too much).
This way, we need to only add one application manually, and yes, that’s the root application.
Setup Git repository
In this tutorial, we will use an existing repository but you can create a new one if you need to. What is important is having a folder for all your Argo CD manifests.

Argo CD directory (the empty YAML is not important)
Connect ArgoCD to our git repo

Open the repository management menu and click ‘Repositories’

Connect repo using a method convenient for you (we use SSH)

Configure repo connection info
To get your SSH key, use:
Find more info on SSH here.

Successfully connected repo
Setup Argo CD as an app of apps
Create the root application

App creation page
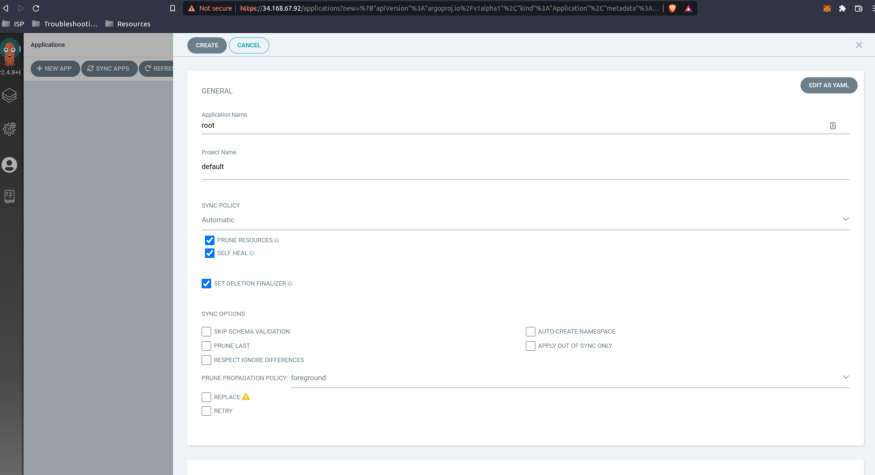
App configuration
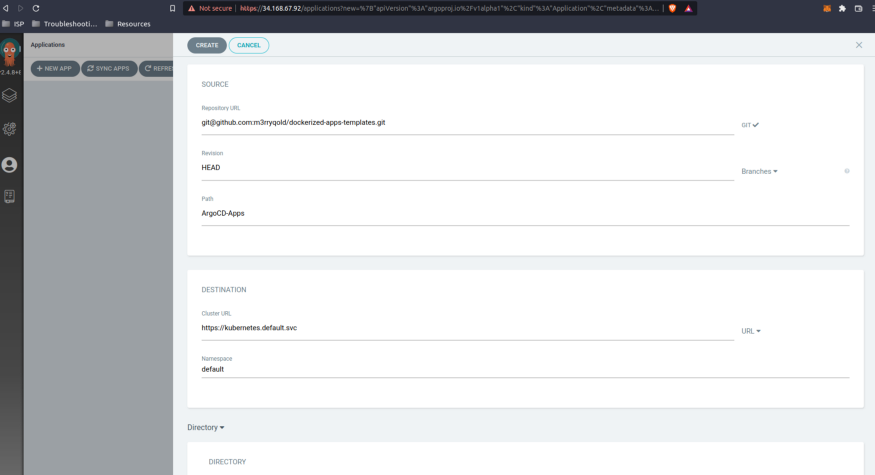
App configuration

App configuration

New application
Deploy other applications using their Helm charts
Traditionally, in Argo CD, we can deploy applications with configurations in manifests that are the same as those we run ‘kubectl apply’ on. However, in our case, we use Helm charts (because it’s easier).
This is usually a 3 step process:
The steps are the same for all apps we want to deploy, except there are special requirements sometimes.
Example: Deploying Nginx
A standard Nginx chart can be found here.

Nginx app configuration
Most of these properties are common to Kubernetes deployment manifests.
Some pointers:
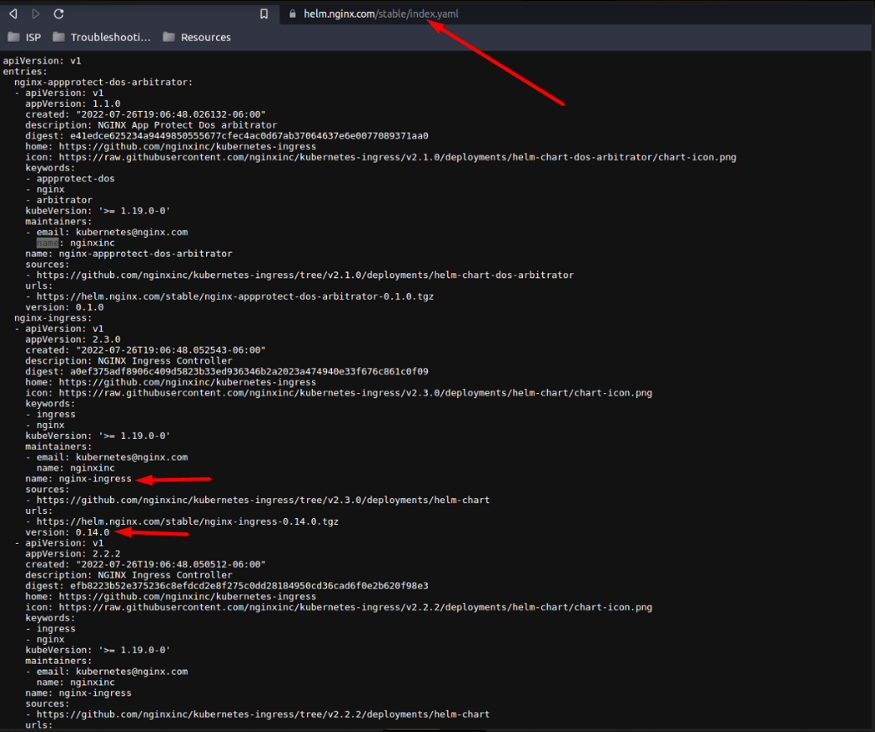
Source info from Nginx Helm chart
Our synchronization is done automatically since we set it that way.
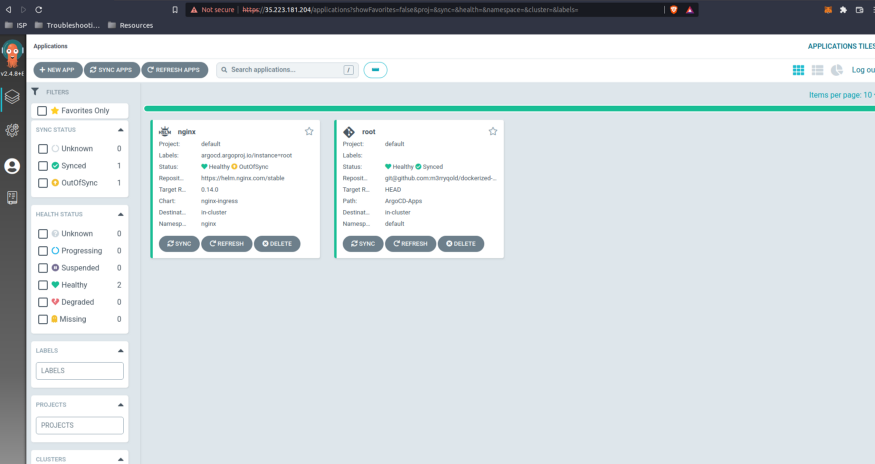
Nginx deployed after adding manifest
Click the ‘nginx’ app

Nginx deployed with all its resources
We can see traffic (network) information using the network view
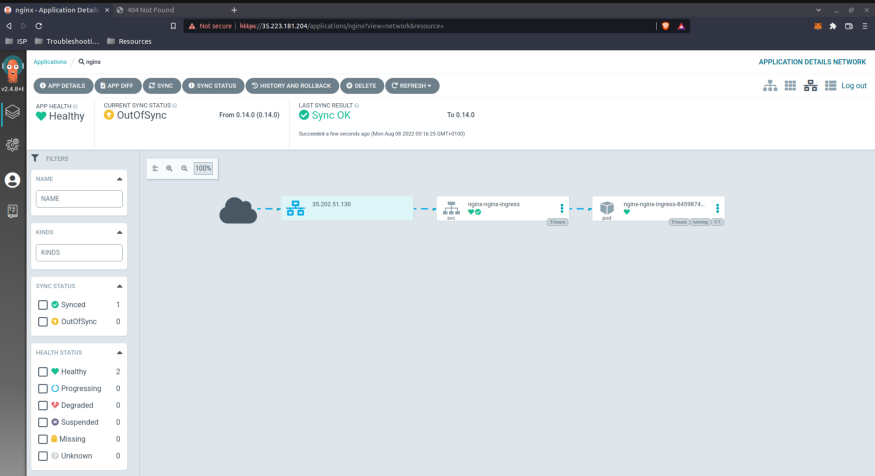
Nginx network view
We can visit the Load Balancer IP address
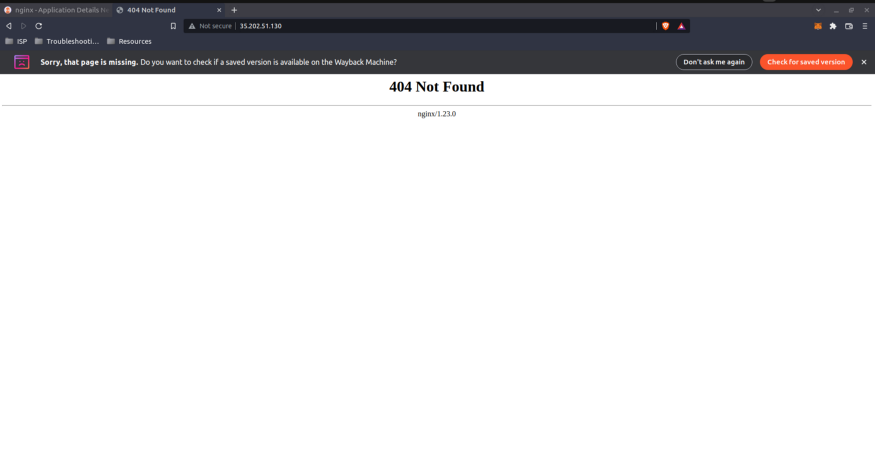
Nginx Ingress
Navigate back to applications and click the root application
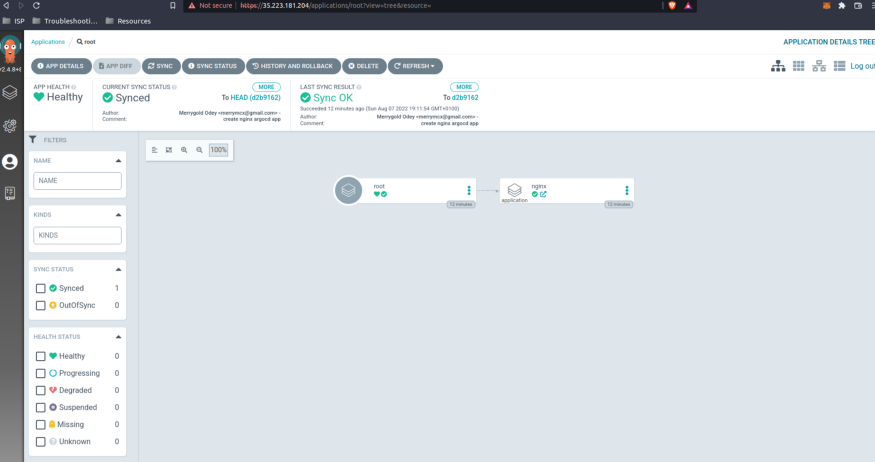
root application
From the image above, we can see that the ‘nginx’ application is represented as a child of the ‘root’ application. This is a basic representation of the ‘app of apps’ concept.
From here on out, your deployment process is basically on autopilot (on some level). All we’ll keep doing is add manifests and maybe customize them if we need to. Let’s add Grafana and Prometheus apps.
Example 2: Deploying Grafana

Grafana app created
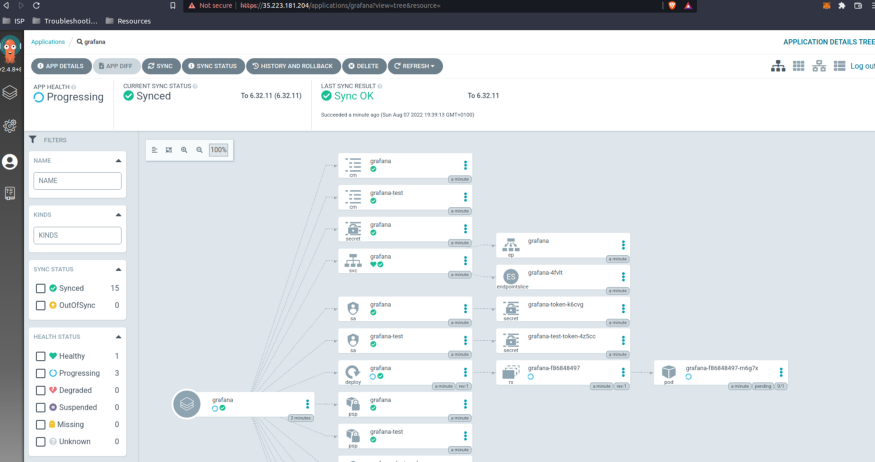
Grafana resources created

Grafana created as a child of the root application
That’s it. Let’s do the same for Prometheus (you can try to do this one yourself before following the instructions below).
Example 3: Deploying Prometheus

Prometheus app created

Prometheus resources created
The error here is because of a GKE autopilot permission we don’t have, don’t bother.

Prometheus created as a child of the root application
In this article, we were able to learn:
TBH, one way or another, something will work. — Timothy Olaleke
Suggested things to explore:
References
Share with your friends and followers
Join other developers and claim your FAUN account now!

DevOps Engineer
@m3rryqold


Influence
Total Hits
Posts

Hand curated newsletters for Developers, private Slack with like minded people, podcasts, job offers, news and more!
