Join us

Kong plugins - intro

You will learn

- What Kong API Gateway is

- What Kong plugins are and how they interact with the request/response flow

- How to setup a local environment to develop and test Kong plugins

- Fetch claims from JWT tokens and use them in response headers

- Setup a custom endpoint in the Kong Admin API

What is Kong?

Kong is an API Gateway that provides a flexible abstraction layer to securely manage communication between clients and microservices through an API.

Kong is a Lua application running on top of nginx. The flexibility of such solution allows for extend functionality by creating custom plugins (native in Lua or GO, JS etc.) that can interact with the request/response flow, communicate with the upstream, or log processes.

Once Kong is running, every request will reach Kong first, and then it will be proxied to the destination service. Between the request and the response, Kong will execute any plugin that you decide to install. Kong effectively becomes the entry point for all API requests.

Kong Plugins

Kong as an API gateway operates in layer 7 (HTTP) which makes it a universal solution that can operate flexible on many levels. One of them is presented in the Workshop section.

Official plugins are hosted on https://docs.konghq.com/hub/. Their source code is located in the “kong” repository https://github.com/Kong/kong/tree/master/kong/plugins, which can be used as a starting point for creating your own plugins. Plugins are also bundled in any deployed Kong. For more information, see https://docs.konghq.com/gateway/2.8.x/plugin-development/file-structure/. Kong documentation is well maintaned, so it is more convenient to refer to it rather than copy here.

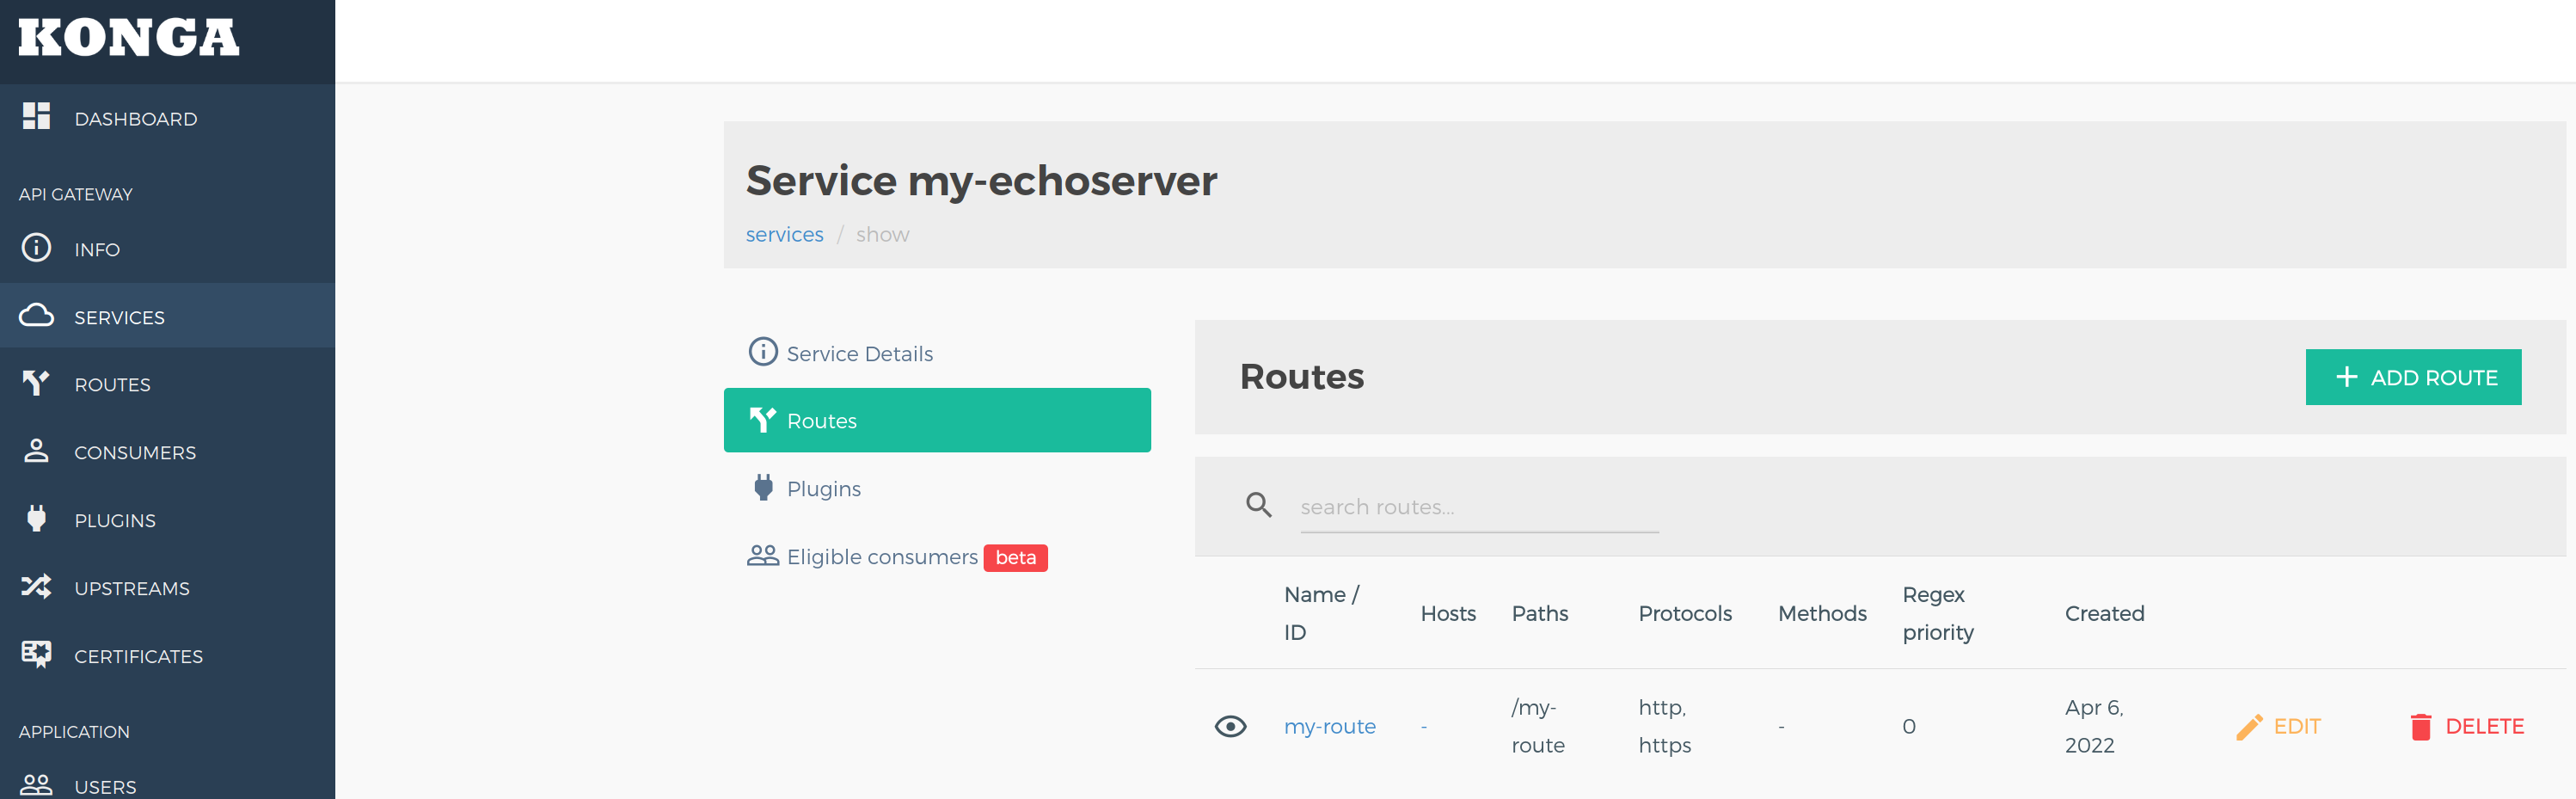
If you want to develop your own plugins, you need to create a proper environment where you can craft them. My choice was docker-compose, which has all Kong related must-have components, such as Kong and Postgres as a datastore. In my stack, I included Konga which is a GUI for Kong. Plugins use mount binding to a Kong container so after a plugin changes, you must execute the docker restart my-kong command.

Workshop

Objective

  • I want to receive a response from “my-echoserver”, which is a container without Docker port mapping so ports are not available on localhost
  • I want to inspect JWT tokens and:
    • Refuse expired tokens
    • Get specific claim from a token and add it to the response header
  • I want to create an Admin API endpoint that will return a static text string

plugin-goal.png

workshop objectives

Prepare the Environment

Before you continue, make sure that your environment has the following tools installed:

NOTE: At the time of creating this post, the latest version of Kong is 2.8 so I included a fixed version in Docker images and documentation links.

Create the docker-compose Environment

To download the repository and start the docker-compose stack, execute the following commands:

                git clone https://github.com/salvadoriume/kong-workshops.git
cd 01-my-plugin
docker-compose up -d
            

Each time you modify a plugin, remember to restart Docker container:

                docker restart my-kong
            

Dependencies (container+port level) are included in below diagram:

kong-plugin-docker-ports.png

Kong docker compose stack ports

To check if your environment is up and running, execute this command:

                http localhost:8001/status
            

The output should be:

                {
    "database": {
        "reachable": true
    },
[...]
            

Check the services, routes and plugins defined in the config file:

                $ cat config/kong.yaml

_format_version: "2.1"
_transform: true

services:
- name: my-echoserver
  url: http://my-echoserver
  routes:
  - name: my-route
    paths:
    - /my-route

plugins:
- name: 01-my-plugin
  config:
    exit_code: 401
            

In this scenario, you want to enable a plugin that you are “developing” in the plugins directory and create the route /my-route that will query http://my-echoserver NOTE: the traffic occurs between containers.

There is a strict file structure requirement for the Kong plugin. For information, see https://docs.konghq.com/gateway/2.8.x/plugin-development/file-structure/. The plugin logic that handles the traffic flow is included in handler.lua and custom Admin API endpoints in api.lua

The declarative configuration file is used mostly as DB-less. In this workshop, however you we will import the declarative config to Kong postgres database. Alternatively, you can achieve the same results by making API calls

The configuration should be loaded after you start the stack:

                $ docker exec -i -t my-kong kong config db_import /opt/kong/kong.yaml

parse successful, beginning import
import successful

$ docker restart my-kong
            

To verify if everything is imported to database, execute the following set of commands:

                PGPASSWORD=kong psql -h localhost -U kong

kong=# select name, enabled from plugins;
     name     | enabled
--------------+---------
 01-my-plugin | t

kong=# select id, host, port from services;
                  id                  |     host      | port
--------------------------------------+---------------+------
 de2a0555-c0cf-5ce9-b87c-b0cfa9451f93 | my-echoserver |   80

kong=# select service_id, paths from routes;
              service_id              |    paths
--------------------------------------+-------------
 de2a0555-c0cf-5ce9-b87c-b0cfa9451f93 | {/my-route}
            

All information that is kept in the Kong datastore can be retrieved through the API:

                $ http localhost:8001/plugins
HTTP/1.1 200 OK
[...]

{
    "data": [
        {
            "config": {
                "exit_code": 401
            },
            "consumer": null,
            "created_at": 1649231368,
            "enabled": true,
            "id": "d28b95ed-6650-5f75-baa7-e7a9073fd405",
            "name": "01-my-plugin",
            "protocols": [
                "grpc",
                "grpcs",
                "http",
                "https"
            ],
            "route": null,
            "service": null,
            "tags": null
        }
    ],
    "next": null
}

$ http localhost:8001/services

HTTP/1.1 200 OK
[...]
{
    "data": [
        {
            "ca_certificates": null,
            "client_certificate": null,
            "connect_timeout": 60000,
            "created_at": 1649231368,
            "enabled": true,
            "host": "my-echoserver",
            "id": "de2a0555-c0cf-5ce9-b87c-b0cfa9451f93",
            "name": "my-echoserver",
            "path": null,
            "port": 80,
            "protocol": "http",
            "read_timeout": 60000,
            "retries": 5,
            "tags": null,
            "tls_verify": null,
            "tls_verify_depth": null,
            "updated_at": 1649231368,
            "write_timeout": 60000
        }
    ],
    "next": null
}

$ http localhost:8001/routes

HTTP/1.1 200 OK
[...]

{
    "data": [
        {
            "created_at": 1649231368,
            "destinations": null,
            "headers": null,
            "hosts": null,
            "https_redirect_status_code": 426,
            "id": "481a9539-f49c-51b6-b2e2-fe99ee68866c",
            "methods": null,
            "name": "my-route",
            "path_handling": "v0",
            "paths": [
                "/my-route"
            ],
            "preserve_host": false,
            "protocols": [
                "http",
                "https"
            ],
            "regex_priority": 0,
            "request_buffering": true,
            "response_buffering": true,
            "service": {
                "id": "de2a0555-c0cf-5ce9-b87c-b0cfa9451f93"
            },
            "snis": null,
            "sources": null,
            "strip_path": true,
            "tags": null,
            "updated_at": 1649231368
        }
    ],
    "next": null
}
            

All Admin API calls can be done in a browser:

If you want to go a step further and visualize the environment in a more readable format, try Konga.

Konga - the Kong GUI

In the previous chapter, you directly verified that the datastore contains information about registered plugins, services, routes. You can get the same information from the Admin API through http requests. Alternatively, you can use the Kong GUI in a browser: http://localhost:1337. To authorize use following credentials: - login admin - password 123123123 Click CONNECTIONS (1) and then Activate to allow connection to the local Kong instance (2). Konga sends the http requests to the Admin API and visualizes it in the browser. Visit (3) for overview of the Kong cluster. Use SERVICES (4) and others panes to verify your local environment setup. You can check command-line and browser way and compare them.

The route defined for your service looks similar to the example:

When all services, routes, plugins are verified, send a request to service that will reach the internal my-echoserver endpoint. Only the Kong container has access to my-echoserver on port 80 (see the diagram).

The basic purpose of the echo-server is to return a response with the whole request. There are some more features that can control its behavior. For information, see the echo-server documentation. You can use some of those features to debug Kong. For example, you can set a specified response time from the echo-server to check how timeouts will impact the application, or specify response headers that will go from in response etc.

                http "localhost:8000/my-route/?test=12345"

HTTP/1.1 200 OK
[...]
       "query": {
            "test": "12345"
        }
            

INFO: This online tool was used to generate example JWT HS256 tokens.

An expired token, back in the year 2020:

                eyJhbGciOiJIUzI1NiJ9.eyJSb2xlIjoiQWRtaW4iLCJJc3N1ZXIiOiJJc3N1ZXIiLCJVc2VybmFtZSI6Ik1pY2hhbEplY3phbGlrIiwiZXhwIjoxNTg1NzQ5MDg1LCJpYXQiOjE2NDg4MjEwODV9.vtySz3LawL5PJKrPCdQix-UhyMGKhvk-xr4x8x2x5Rs
            

A token that will expire in the year 2050:

                eyJhbGciOiJIUzI1NiJ9.eyJSb2xlIjoiQWRtaW4iLCJJc3N1ZXIiOiJJc3N1ZXIiLCJVc2VybmFtZSI6Ik1pY2hhbEplY3phbGlrIiwiZXhwIjoyNTMyNDMzODg1LCJpYXQiOjE2NDg4MjEwODV9.UCEMSF8D7_NvCLyYc35shpdO7_p2Alb0iuFXnwoiSOY
            

Use https://jwt.io to decode tokens and see the payloads.

Use the expired token:

                http -A bearer -a $(cat token_expired.jwt) localhost:8000/my-route
HTTP/1.1 401 Unauthorized
[...]

JwtError: token expired
            

The plugin inspected the claim “exp” in the JWT token and exited due to the expiration time.

When you use a valid token, the custom logic comes into play and the response header contains the claim from the JWT token:

                http -A bearer -a $(cat token_valid.jwt) localhost:8000/my-route
HTTP/1.1 200 OK
JWT-username: MichalJeczalik
Via: kong/2.8.0
[...]
            

The api.lua contains a new defined Admin API endpoint with the custom logic:

                return {
  ["/my-plugin/ping"] = {
      GET = function(self)
        return kong.response.exit(200, "PONG")
      end
  },
}
            

To check if it is working correctly, make a requests to /ping endpoint:

                http localhost:8001/my-plugin/ping
HTTP/1.1 200 OK
[...]

PONG
            

The objective is achieved. It is only a starting point in the topic of the Kong plugins development.

To clean up the environment after the workshop, execute the following command:

                docker-compose rm
            
As I write this article I am working in the DevOps team at Shiji Poland


Only registered users can post comments. Please, login or signup.

Start blogging about your favorite technologies, reach more readers and earn rewards!

Join other developers and claim your FAUN account now!

User Popularity
15

Influence

2k

Total Hits

1

Posts