Join us
@sofiatarhonska ・ Sep 22,2022 ・ 8 min read・ 2k views ・ Originally posted on mailtrap.io


ReactJS is a fabulous library for building good-looking web applications. It can handle any kind of responsive interfaces and complex interactions you can think of. But things might get a bit tricky if you need to add some typically backend-minded functionalities to your web application. Think of a simple contact form placed at one of the subpages. While building a React email template will be a piece of cake (not that yummy, though!), adding sending capabilities requires a bit of research.
In this article, we’re covering various methods and we’ll also share some recommendations along the way.
Can you send even the simplest emails from a React-powered website without any 3rd-party plugins? Unfortunately not. React JS apps are run on the client-side (in a browser) and the SMTP server needs to be set up on the server-side. In theory, you could provide your SMTP credentials on the client-side, directly in the code. But since leaving such sensitive data for everyone to see and use is a rather poor idea, we’re not going to elaborate on it any further.
We’re going to talk later on about how to set up an express backend and add a 3rd party mailing capability. Let’s start with an easier method first, though!
Now, let’s look at the approach that won’t require setting up a backend at all.
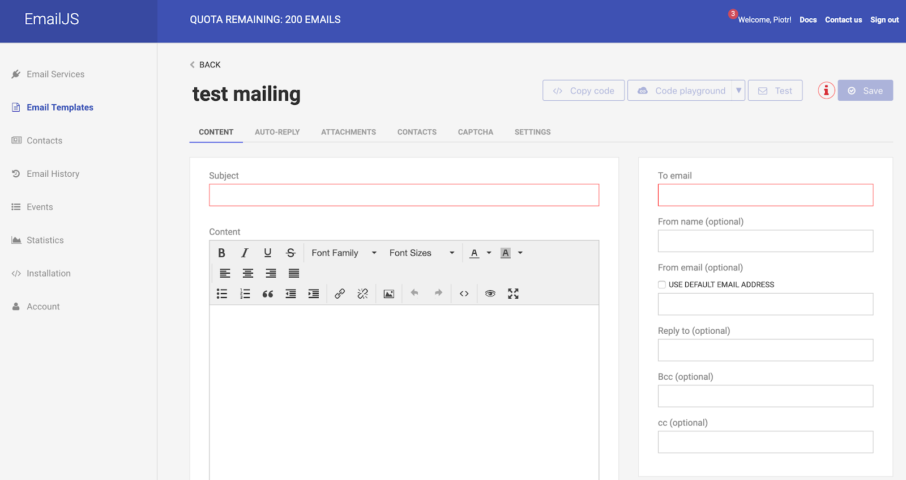
We’ll set up an external tool to handle email sending for us and we’ll only make sure to trigger this tool when a mailing is due. We’re going to use a very popular service called EmailJS. It lets you connect your email client in the browser, build a template and send it with EmailJS API. The tool is not meant strictly for ReactJS and will also work perfectly with other frameworks such as Vue.js or Angular. There are lots of email services you can use it with, ranging from typical personal-email services such as Gmail and Outlook to more mass-email-bound tools like Mandrill or Mailgun. Pricings for each differ and most come with a free, limited tier.

For this example, we’ll stick with Gmail.
To get started, create an EmailJS account at https://www.emailjs.com and connect your desired email handling service.
Then, start building your first templates with the built-in email template editor. It’s really straightforward to use so we’re not going to go into details here. To make your emails more personalized, take advantage of dynamic variables. EmailJS also comes with other features, such as auto-reply or an option to add attachments. You can use `Email Template Example` which is added to your profile by EmailJS by default as a reference.
Now, it’s time to add EmailJS to your React project. If you are using a bundler like Webpack, install it with npm as detailed here.
Alternatively, if your app was built with Create-React-App, you might add EmailJS directly to the head of public/index.html file. For the following examples, we will provide explanations assuming you’re working with an app built with Create-React-App.
Once that’s set up, let’s move on to sending the actual email. EmailJS offers two methods for doing so:
Here’s a sample code of a React email form component. Put it to the src/Form.js file in your project.
Now we need to add a handleSubmit() function to our component to call sendFeedback() function that will, as a result, trigger email sending via EmailJS. To keep it simple, we’ll use the default emailjs.send function.
Replace the function parameters with your own and test if everything went smoothly in the EmailJS dashboard.
Don’t forget to import and use your Form component from the main component of your application which is located at src/App.js.

That’s all! Went pretty smoothly, huh?
If EmailJS won’t work for your use case, there’s an option to set up your own backend quickly and connect the 3rd party tool for email sending. As mentioned in the beginning of this article, ReactJS itself doesn’t have sending capabilities.
The set up is very easy. This guide takes you step by step through the steps required to quickly build an Express Node.js backend.
Once you have the backend, it’s time to connect a service specializing in sending emails. Follow this example to see how Mailjet can be implemented with your Express backend. Of course, many other tools such as SendGrid, Sendinblue or Mandrill can be implemented too thanks to their APIs. Please refer to their documentation for more details.
As you can see, this approach is fairly quick to set up and will do its job for basic things, such as most contact forms. Since emails sent this way land usually in your inboxes, you don’t care much about formatting and styles. If the email workflow you just added is meant for the user’s inbox (for example, a newsletter confirmation form), you probably want to beautify the message a little bit. Let’s talk about how to do it.
As you know, ReactJS projects are built using reusable components, pieces of UI that can be grouped with one another and placed around web pages with almost no effort. To no surprise, building an email template in React works in exactly the same fashion.
If you’ve ever tried to build and deliver emails with any framework, you know how painful it can be. What looks great on your testing environment, might render as a completely random set of styles and copy on users’ devices. Many browsers recognize <style> tags but others will omit them. Others work with inline styles but, again – not all of them. As a result, even if you test your emails inside out, possibly something is bound to go wrong.
One tool that aims to prevent such troubles is Mjml. It’s a markup language that makes it easy to generate fully-responsive HTML templates. It comes with a large set of frequently used components that can be inserted in your mailings without coding them from scratch.
Another really useful tool you can use is React-html-email. It’s used to quickly build reusable components of your choice. You insert your code sample, however long it is, and immediately get a single-line code component you can use throughout the project. See the example below:
Add the code from above to a file in your client project to src directory and call it Email.js. Don’t forget to add react-html-email component to your project. Then import this component to client/src/Form.js and renderEmail from react-html-email to client/src/Form.js.
After that you can use the following line to generate HTML code of your message:
React-html-email comes with an email validator that immediately checks and informs you if there were any errors in the component’s code.
There’s also a really interesting WYSIWYG email editor for React with drag & drop features, aptly known as React Email Editor. Check it out and see if it can accelerate your development.
Finally, whether you use these tools or not, there’s a bunch of tips to take into consideration when trying to build a responsive email template. This article makes for a fairly compelling source.
Sending emails with Nodemailer
Now, let’s assume we want to use Nodemailer to build a backend for our React email client. It’s perfectly doable and not so hard to set up.
Nodemailer is a go-to module for anyone needing to send emails with Node.js framework. If you followed the example above, you should have already both Create-React-App and Express server set up. If you don’t, do it before we start as we’ll be using both.
In this example, we’ll refer to a web form you could add to your website, for example, to let customers reach out quickly to your sales and support teams. Start off with building the UI of such form in ReactJS. Need some inspiration? Check out this list of 45 ready-to-implement React forms.
Now, add the code to handle the form submissions. There are tons of parameters that can be used with Nodemailer, review them here and add according to your needs. Here’s an example:
Add axios to your client application. In express_react_example/client run:
And add the import to the express_react_example/client/Form.js:
Make sure you reset the form once a message is submitted, in case a user wants to send another one.
Now, it’s about time we add Nodemailer to our project (the backend part):
and create a config file to store the credentials of an account we’re going to use. We’re adding it to the backend so there are no security concerns this time. Put this file next to your server source code and call it config.js.
Then, we’ll want to set up the transporter to deliver our messages. Nodemailer can be used with different types of transporters. We recommend the default one, referred to as SMTP transporter, due to the simplicity of installation and its reliability. If you’re not happy with it, you can also integrate other transporters with your Nodemailer campaign. We’ll stick with the default one here.
First of all, we need to share our credentials with the SMTP transporter. Add the following code to your server source code which should be called server.js if you followed the Express.js setup instructions:
Once done, we set up the post route to take our emails to its final destination – our inbox!
Now run the backend by running the following command in the root of your application:
And run the frontend part too by running the command at the client directory:
All done! You should receive an email, the form will reset and a user should see the confirmation you added in your React project.

We’ve tried to summarize various methods that can be used to send emails in ReactJS. Given how powerful and useful React is for nearly all kinds of projects, you don’t want to get stuck on something as simple as form submission. By all means, try them all and see which fits best for your project. Best of luck!
I hope you enjoyed reading our tutorial on how to send emails in React with code examples that was originally published on Mailtrap Blog.
Share with your friends and followers
Join other developers and claim your FAUN account now!


Influence
Total Hits
Posts

Hand curated newsletters for Developers, private Slack with like minded people, podcasts, job offers, news and more!

