Here are some examples of automation for Jira:
- Making changes based on workflow transitions
- Automatically assigning tasks to specific team members based on the content of a work item
- Cloning tickets from Jira Service Management to create a task for developers in Jira
- Sending regular status updates and other notifications via email or a messenger app, such as Slack
- Automatically creating work items for recurring tasks
- Adding checklists to the work item creation or on transition
We’ll talk about examples in more detail shortly. But first, let’s review some basics.
What Types of Automation Can You Use in Jira?
As a truly versatile project management platform, Jira allows you to set up automation in various ways. Here are the options to choose from:
- Automation for Jira – this is the core native automation functionality. It enables you to create complex custom rules that take into account multiple conditions. With rules, work items can be automatically created, closed, reassigned, and so on.
- Workflow automation – you can incorporate automation directly into your workflows by using Workflow Editor and other tools. As a result, certain actions can be performed automatically once a Jira work item moves from one workflow status to another.
- Data integration – if needed, you can connect Jira to external apps and set up automated data exchange. For example, export data from Jira to Excel for advanced analysis or sync GitHub statuses to Jira tickets.
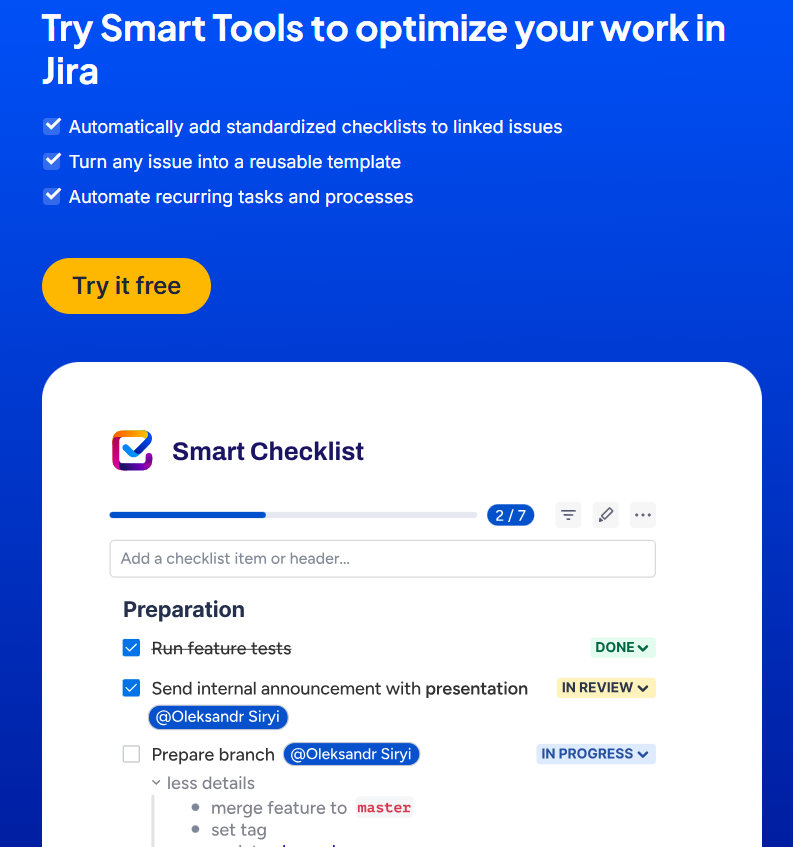
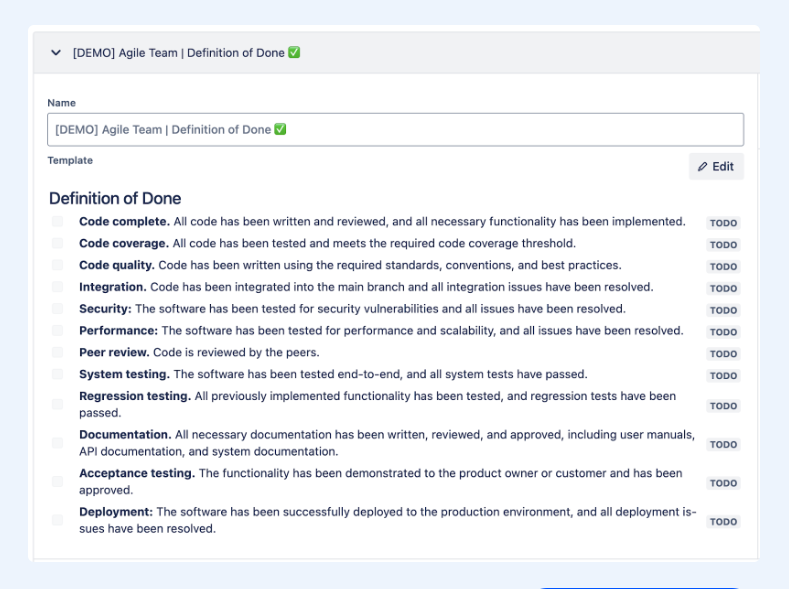
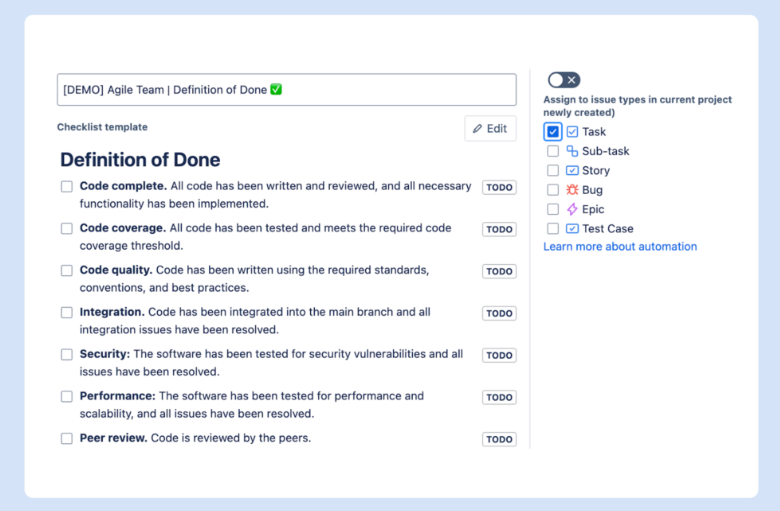
- Using third-party solutions – it’s also possible to automate different aspects of your work in Jira with the help of various Jira add-ons, plugins, and other solutions. For example, Smart Checklist by Titan Apps can automatically add the Definition of Done checklist to your Jira tasks – without using Jira’s native rules.
- Advanced automation with the Jira API – this option is only suitable for users with a strong technical background. By calling the API, you can programmatically change work items in Jira or trigger actions based on events in other systems.
This article will primarily cover Jira’s native automation features, but we’ll also discuss using third-party solutions and briefly touch on other options.
Project VS Global Jira Automation Rules
Project-specific rules only apply to the current Jira project, while global rules can apply to multiple projects within your Jira instance. Using the latter option is often more convenient than having to set up the same rule separately for each project.
While native automation functionality is included with all Jira plans, there are some limitations. For example, you can add global or multi-project automation rules only if you have a Premium or Enterprise plan. There are also different rule run limits depending on your plan.
Users and Permissions
Not every Jira user can create or edit automation rules. You will need to be a Jira admin or a Project Admin to access this functionality.
If you have access, you can set up new rules by navigating to Project Settings -> Automation. Alternatively, press the lightning icon above your project board.
Jira Automation Rules
Individual automations created with Jira’s native functionality are called rules. You can create them using 4 elements:
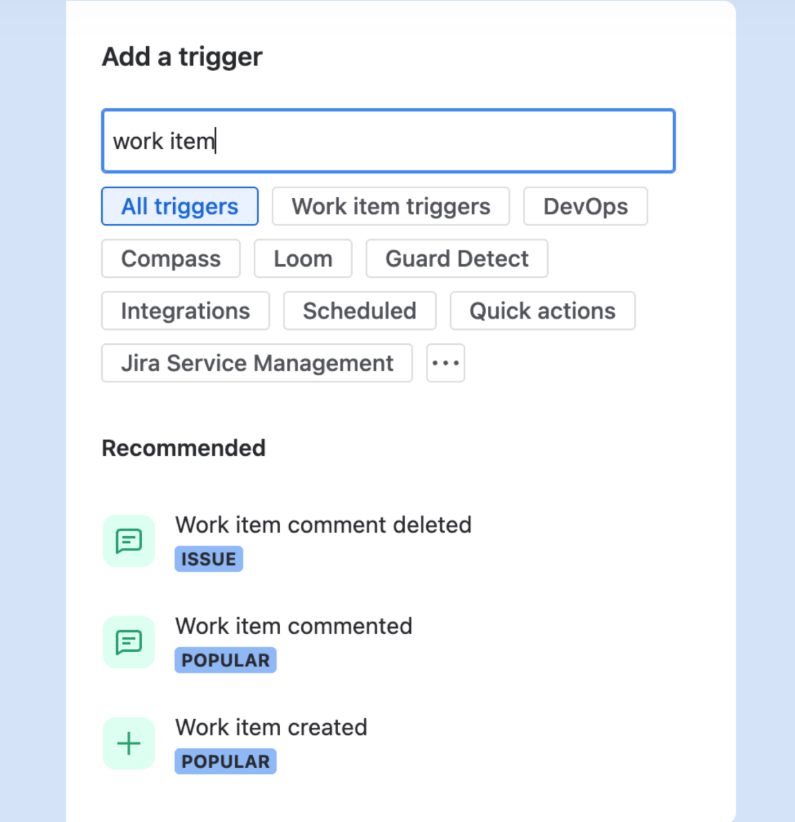
- Trigger: When a trigger event happens, the automation rule runs
- Condition: Once the rule runs, it checks whether the conditions specified in the rule are met. If yes, the prescribed action is performed
- New branch: This element creates a branch that allows you to set up separate conditions for certain elements, such as subtasks of a parent work item (Jira issue)
- New action: This one defines what the system does when the rule is triggered and all the conditions are met
Don’t worry if this seems too complicated – all Jira best practices look hard at first. Luckily, creating rules is only intimidating on paper and gets much easier with practice. Speaking of the devil – let’s do just that and create a custom automation rule.
How to Set up a Jira Automation Rule?
- Go to Project Settings -> Automation. Click Create Rule. To use this feature, you must have Administrator rights for your project.
- Select the trigger. Type in the action or event you’d like to add as a trigger into the search bar and find it on the list. For example, Work item created (Issue created) or Work item commented.
- Add conditions to your rule and specify the required details. For example, Work item type is Epic or Reporter field is empty. If you don’t have a condition, you can skip this part. In this case, the target action will be performed every time the rule is triggered, without any conditions.
- Select the action that should be performed and provide the details related to that action.
- Save and turn on your rule. You can also validate it before enabling it.
How to Set Up Automation in Jira Not Using The Native Rules
As I mentioned earlier, you don’t necessarily have to use Jira’s native functionality. Some automations are easier to set up with third-party tools.
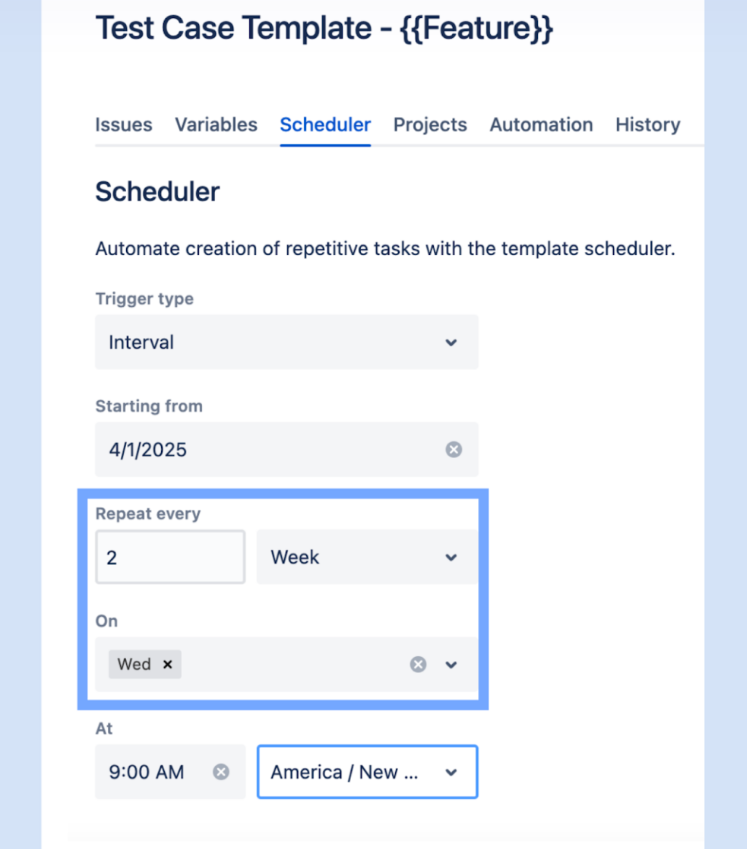
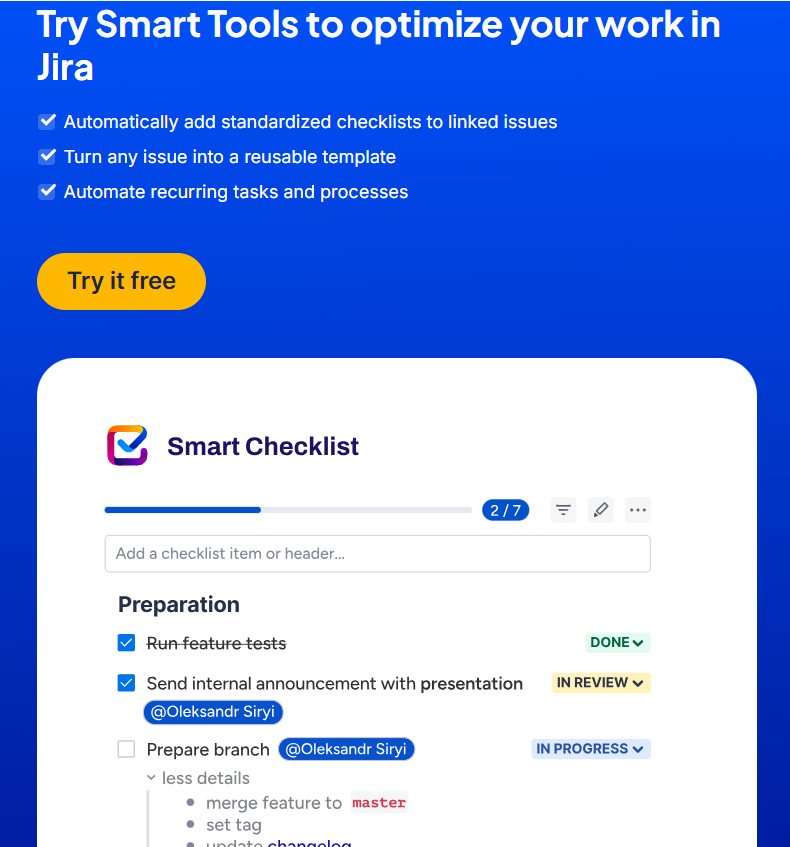
You can use Smart Checklist by Titan Apps to automatically add checklists to work items, demonstrating how AI enhances SaaS automation workflows by reducing manual effort and improving process consistency. Another solution, Smart Templates, enables you to create work item templates and generate new Jira tasks on a scheduled basis.
There are many other apps on the Atlassian Marketplace. Many of them support various automation needs.
This approach has several advantages:
- You don’t spend your Jira automation limit: Depending on your plan, you will have a certain number of rule runs available to your organization per month. Using third-party tools for automation allows you to save these limits.
- You can set up automation faster: It’s typically easier to configure an automation with a user-friendly third-party solution. This doesn’t require prior knowledge or a tech background.
- You get feature-specific automations: For example, Smart Checklist allows you to set up automations involving checklists. The solution is specifically tailored to this use case.
Let’s see how this can be done in practice.
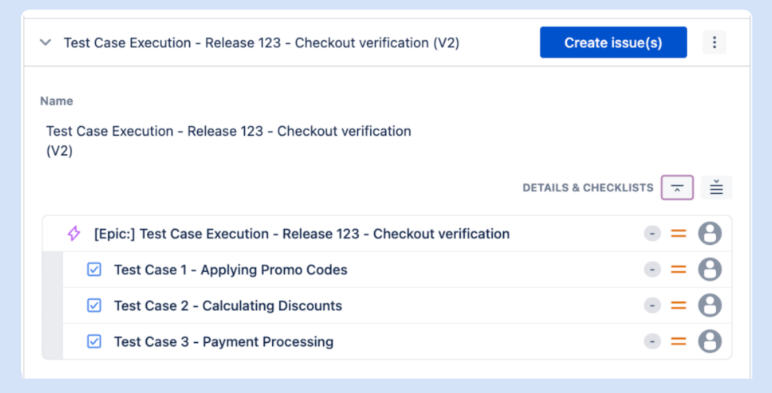
Example 1. Automatically Add Checklists to Work Items of a Selected Type
Checklists are particularly helpful when tasks involve multiple steps. If these tasks repeat often, then checklists will be even more useful. They can be saved as templates and reused multiple times. What’s best, they can be added to work items automatically. As a result, you won’t have to start from scratch and will have a ready checklist when you begin working on the task.
A classic example for agile teams is the Definition of Done checklist. It contains a set of criteria that help you check if a task is truly done and whether it meets all the quality requirements. Here’s how it can look: