


Let’s say you’ve picked Microsoft Azure as a cloud-computing platform for your environment. You may need it for hosting your app, or whatever. At some point, you will need to implement email sending, and this might be troublesome. You can’t send emails directly from any service in Azure. Why? You’ll find the answer below, as well as the details about how to send emails from Azure.
Azure SMTP restrictions
Since November, 15, 2017, Microsoft has banned outbound SMTP communication from Azure computing resources in trial subscriptions.
The restriction applies to unauthenticated email delivery (without SPF, DKIM and DMARC records) via SMTP port 25 through direct DNS MX lookups. The idea is to protect Azure data center IP addresses from reputation abuse. A free account offers $200 credits for 30 days. You can use those to experiment with any service within the Azure platform. With that in mind, users take advantage of this offer for hosting and testing their apps or servers. Isn’t that for what a trial subscription is meant? In practice, those apps/servers send emails without proper sender authentication records. As a result, the reputation of Azure data center public IP addresses drops and they get blacklisted.
The Azure SMTP restriction does not affect enterprise users. Pay-As-You-Go subscribers can unblock the restriction. They need to send a respective support request, which has to be approved by Microsoft.
If you’re a trial subscriber, hold off on switching to AWS or another Azure alternative. You can send emails from Azure but via an SMTP relay service.
What do I need to send emails from Azure?
To send emails from Azure VMs or Apps, use an authenticated SMTP relay service, also known as a Smart Host, with TLS support.
This is an official recommendation by Microsoft for Azure customers. SMTP relay services provide an intermediary SMTP server between the mail servers of the sender and recipient. The TCP connection is established via the secure ports 587 or 443. However, other SMTP ports may be supported as well.
SendGrid is the most common SMTP relay service to integrate with Microsoft Azure. It allows you to use SendGrid SMTP API (not to be confused with Web or HTTP API) for sending emails. This SMTP relay service is a front-line player in this blog post. We’ll also take a look at such options as Mailjet and Office 365. However, you’re free to pick any authenticated smart host on the market like Elastic Email, SocketLabs, and so on. You can use any of these services without any restriction regardless of your Azure subscription.
Send emails with SendGrid
SendGrid is a recommended method for sending emails from the Azure function, web job, or any app. SendGrid offers 25K of free emails per month and all sorts of APIs including SMTP, Web, Event, and others. To start using the SMTP relay, you need to create an account and get your SendGrid SMTP credentials. With SMTP API, you’ll need to make a few more manipulations. So, let’s start with the basics.
SendGrid integration into your Azure environment
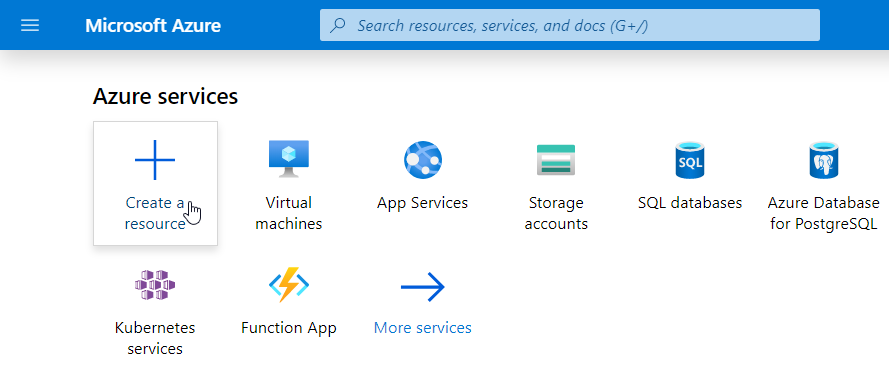
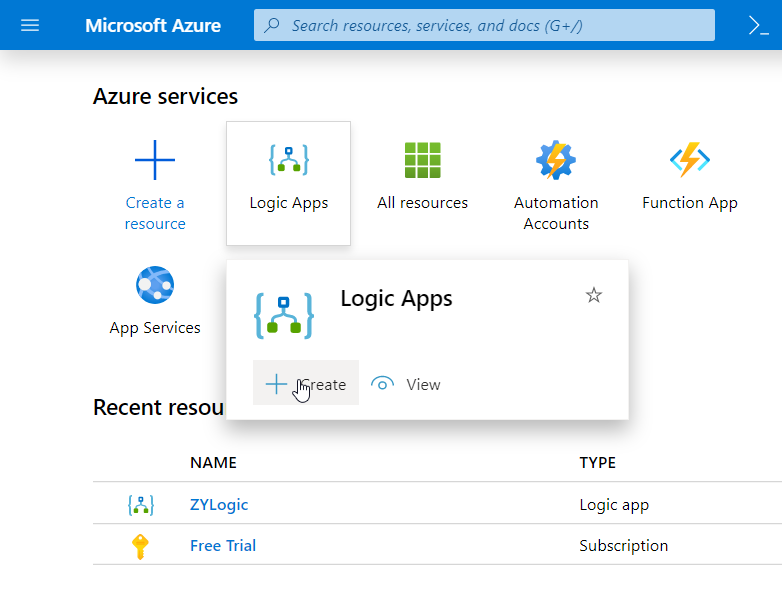
- Sign in to Azure Portal and click Create a resource.
How to Send and Test Emails in Azure (source)
- Find SendGrid in the search field and select. After that, click Create.

How to Send and Test Emails in Azure (source)
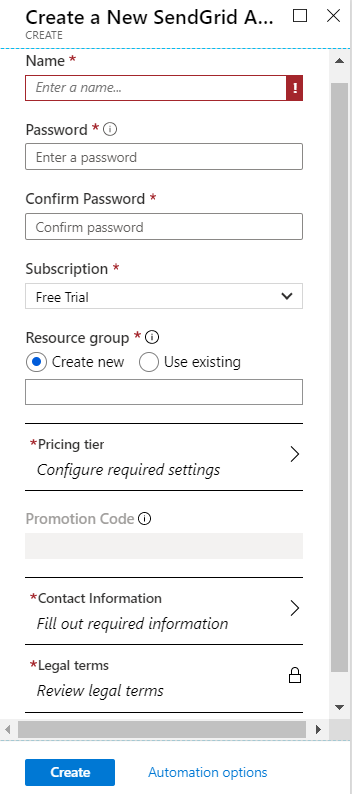
- You’ll need to:
- fill out a few fields: Name, Password, and Confirm Password. These parameters will be used to create a new SendGrid account.
- select a Subscription
- create a new Resource group or use an existing one
- select a Pricing tier
- provide contact information
- and accept the Terms of Use
Click Create once you’re ready.
Sending Emails with Azure (source)
- In the end, you’ll see a Deployment Succeeded pop-up, and your account will be listed in SendGrid Accounts.

- Enter your brand-new account and click the Manage button. This is required to initiate the email verification process. SendGrid will send you a confirmation email to your address.

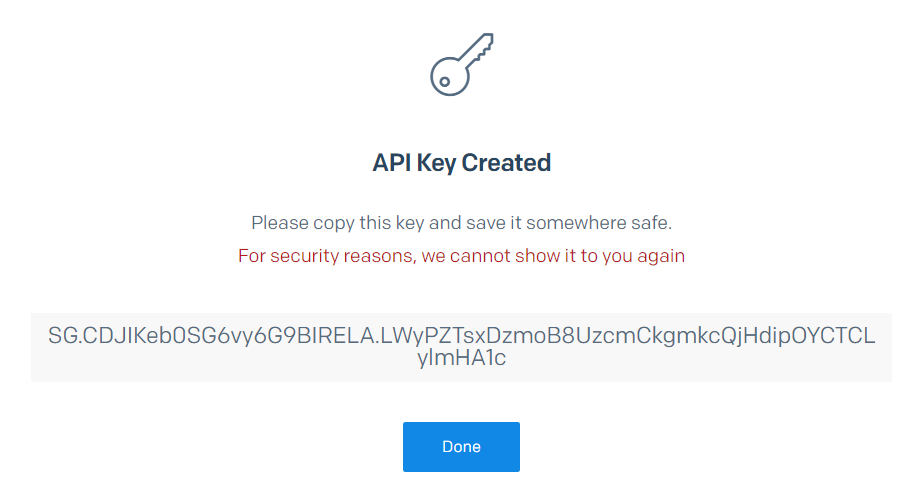
- If you’d like to opt for SendGrid SMTP API, you need to generate an API Key. Click Manage=> Settings=> API Keys.

- After you click Create API Key, provide a name for the key, and select a permission. Click Create & View once ready.

- When you see your API Key, copy it and save. Keep in mind that you won’t be able to see it again.
(source)
Sending emails from Azure via SendGrid
Now, you have a functioning SMTP relay service, so you can send emails from Azure. And there are a few ways to do this.
Using PowerShell via SMTP
Use your SendGrid SMTP server credentials to send emails via PowerShell. Here is a script for a simple text email:
Using .NET’s Built-in SMTP Library
Here is the code sample for building a MIME email and sending it through SendGrid:
Using the SendGrid C# Library via SMTP API
Install the SendGrid NuGet package in your app. It is a C# client library that will let you use SendGrid APIs to send emails. You can install it right from Visual Studio via Tools => NuGet Package Manager => Manage NuGet Packages for Solution. Browse for SendGrid and install the latest stable version.

(source)
Now, check out the following code sample for sending a simple email:
Using MailHelper class from ASP .NET Core API
You can also send emails from ASP .NET Core. For this, use the MailHelper class of SendGrid.Helpers.Mail namespace. The API key needs to be stored in the appsettings.json file (you can tweak it from the Azure Portal as well). Here is how it should look:
To access the API Key from appsettings.json, create the Startup.cs file. Inject the IConfiguration interface at the constructor of the controller after adding it in the ConfigureServicesmethod below:
And here is the sample code for the controller:
If you want to add an attachment to your email, call the AddAttachment method and specify the file name and Base64 encoded content. For example:
Sending emails from Azure Automation runbook via SendGrid
This requires two steps:
- Create an Azure KeyVault and store the SendGrid API key in it
- Create a runbook that retrieves the API key and sends an email
Creating an Azure KeyVault
Use the following script to create an Azure KeyVault. Insert your variables and run the code in Azure PowerShell. You can also run the code locally if you have the Azure PowerShell Module installed.
There are other ways to create an Azure KeyVault. Here is one using Portal.
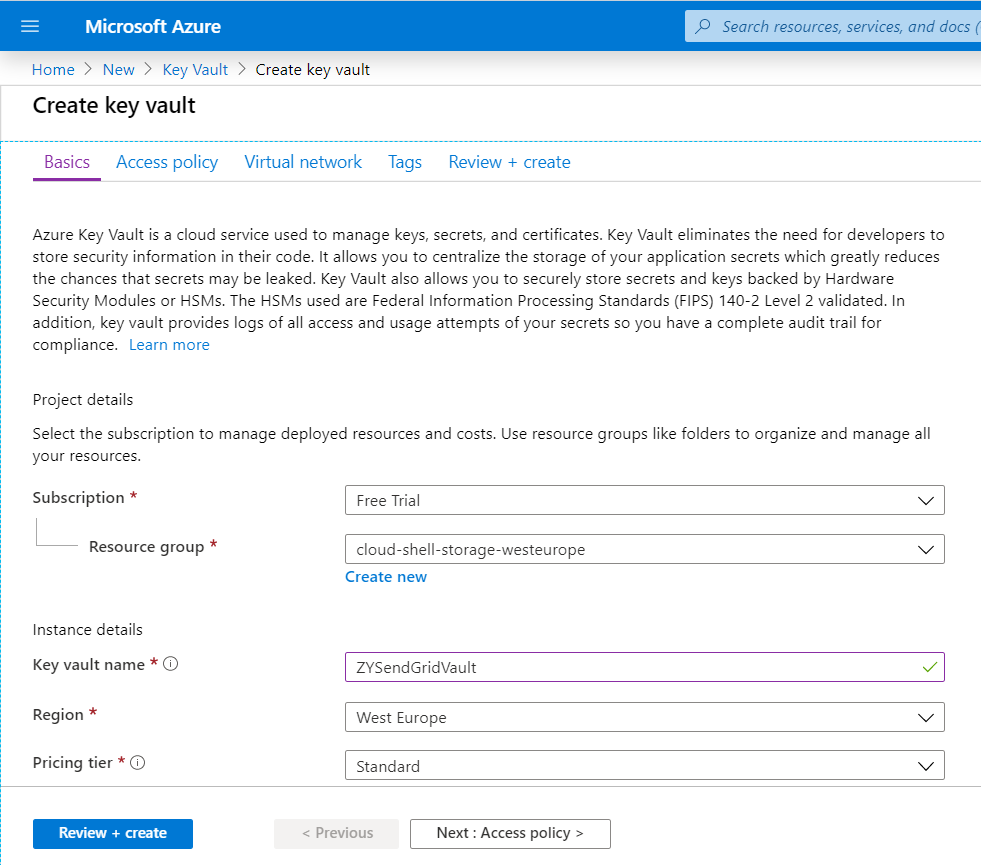
Click Create a Resource and browse “Key Vault”. Click Create.

(source)
Fill out the required fields and click Review + Create.
(source)
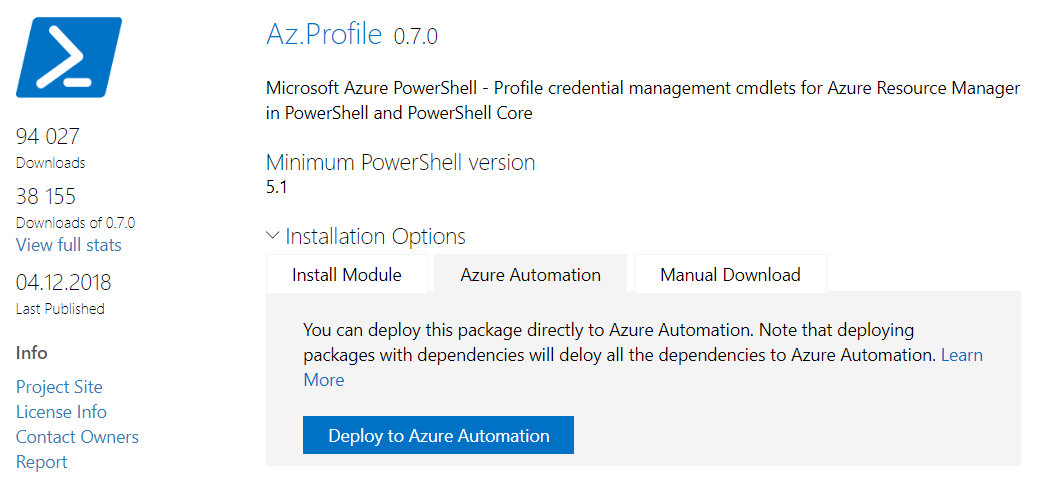
To use Azure KeyVault within a runbook, you need to import Az.Profile and Az.KeyVault modules to your Automation Account. You can do this via PowerShell:
Install-Module -Name Az.Profile
Install-Module -Name Az.KeyVault -RequiredVersion 1.3.1
Or deploy these packages directly to Azure Automation.
(source)
Create a runbook to send an email
Do the following:
- Select Runbooks under Process Automation in your Azure Automation account.
- Select + Create a runbook.
- Enter Send-GridMailMessage for the runbook name. Select PowerShell for the runbook type and click Create Runbook.
- Copy the following PowerShell example in the opened Edit PowerShell Runbook page.
Send emails with Mailjet
Similar to SendGrid, Mailjet Email Service is also available on the Azure Marketplace. That’s why, you need to create a Mailjet account and integrate it with Azure. The flow will be almost the same as with SendGrid. The main difference is that Mailjet’s free plan offers only 6K emails compared to SendGrid’s 25K.
Once you’ve seen a Deployment Succeeded pop-up, your Mailjet account has been created but is still in quarantine until you activate it. For this, click Manage, and select Add a Sender Domain or Address in the opened page.

(source)
Enter your email address and wait for the confirmation mail. After that, you can send emails from Azure with Mailjet. The required SMTP credentials can be found on the page SMTP and SEND API Settings; your API Key is available on the page Master API Key & Sub API key management.

(source)
Similar to SendGrid, you can install the Maijet NuGet package to send emails using the .NET class library via the SMTP API. It contains the following namespaces: Mailjet.Client and Mailjet.Client.Resources, which should be declared at the top a C# file.
As for the rest, you can replace SendGrid credentials with those of Mailjet in the code samples above and send emails from Azure with Mailjet. And here is the code sample for building a MIME email and sending it through SendGrid:
Sending email from Azure using Office 365
If you have an Office 365 subscription, you can use it to send and receive emails from Azure web apps. You’ll need to insert your SMTP server credentials, and employ the System.Net.Mail class. Check out the following script as an example:
Office 365 Outlook connector
Microsoft Azure provides a connector to Outlook Office 365 in a logic app. This allows you to trigger email delivery from a specific event or action. For example, if an upcoming event in your calendar is starting soon, Azure will send an email. Let’s check out how it works.
- First, you need to create a connection between your Azure account and your Office 365 account. For this, crease a logic app in the Azure Portal.
- Specify the name, resource group, and location, and click Create at the end.

- Once created, open your logic app and browse Office 365 in the search box.

- Pick an action and a trigger. For example:
- Action: Send an email
- Trigger: When an upcoming event is starting soon
You’ll be offered to sign in to Office 365.
- The connection has been created. Now, let’s tweak both the action and the trigger:
The Trigger
- Select a calendar from the drop-down list.
- Adjust Frequency and Interval. For example, we need to trigger the action (Send an email) 10 minutes before the calendar event is about to start: set Frequency to Minute, Interval to 15.
- Save your changes.
The Action
- Add a Send an email action.
- Adjust variables and save changes.
Now, your logic app is saved and automatically enabled.
Can I send emails with Gmail?
Some assume that it is possible to use Gmail as a relay server on port 587. However, you won’t be able to send emails from Azure via smtp.gmail.com on any port. If you try this, you’re likely to get the following error:
[Error] Exception while executing function: Functions.TimerTriggerCSharp1. Microsoft.Azure.WebJobs.Script: One or more errors occurred. System: The SMTP server requires a secure connection or the client was not authenticated. The server response was: 5.5.1 Authentication Required. Learn more at.
or another one:
[Error] Exception while executing function: Functions.TimerTriggerCSharp1. Microsoft.Azure.WebJobs.Script: One or more errors occurred. System: Failure sending mail. System: Unable to read data from the transport connection: net_io_connectionclosed.
How to test email sending in Azure
Since Azure uses external SMTP relays to send emails, you’ll need to test those. In the blog post, Test SMTP Relay, we described a few tools for that. The testing flow mostly looks as follows:
- you need to connect to the SMTP relay server
- and send an email from it without authentication
If the email has been sent, your SMTP server is an open relay and this must be fixed. As an example, let’s test the SendGrid SMTP relay using Mail Server Testing Tool. That’s what we’ve got:
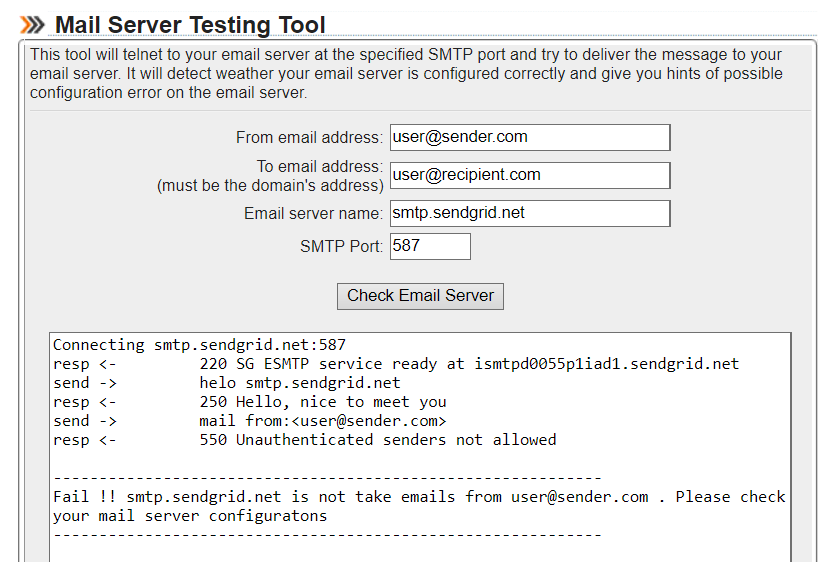
Don’t be confused with the following:
Fail !! smtp.sendgrid.net does not take emails from user@sender.com. Please check your mail server configurations
This means that the SMTP relay works with authenticated senders only, which is fine.
For testing SMTP APIs, you can make use of a dedicated software, such as Fiddler or Postman.
Unfortunately, you can’t use Mailtrap for sending test emails from Azure for now. This is a sad gap by Microsoft because Mailtrap, with its fake SMTP server underneath, can do many things, such as:
- send test emails without reaching real inboxes
- run integration or load email tests via API
- check emails for spam
- test HTML for support by basic email clients
- test Bcc in your emails
- and more that you can discover in the Mailtrap Getting Started Guide
Conclusion
Generally, email sending from Azure depends on the third-party SMTP relay service. SendGrid is the most common and recommended solution for that. You can find many examples and docs on how to integrate Azure and SendGrid and send emails. At the same time, you can opt for another solution supporting SMTP relay: Mailjet, SocketLabs, Elastic Email, and so on. Sending emails with Office 365 is also possible, though it’s mostly used for logic apps.
Thanks for reading our guide on how to send emails using Azure, which was originally published in the Mailtrap blog by Dmitriy Shcherbakan.
Share with your friends and followers
Start blogging about your favorite technologies, reach more readers and earn rewards!
Join other developers and claim your FAUN account now!
Mailtrap
Email Sandbox Service


User Popularity
807
Influence
81k
Total Hits
25
Posts


Read, Learn, Know, Teach
Hand curated newsletters for Developers, private Slack with like minded people, podcasts, job offers, news and more!

Only registered users can post comments. Please, login or signup.