If setting up a virtual development environment is your goal, here is a guide on how to utilize the vagrant box and virtual machine for this purpose. Let’s discuss the process in detail with this blog.
Here, we will build a vagrant on top of a virtualization engine, as VirtualBox.
Creating the vagrant box
Download VirtualBox and create a directory. You will also need a base operating system. Let’s use ‘ubuntu/trusty64’ for now. Now, we need to initiate the use of the vagrant directory as ‘vagrant init’ and the operating system name.
So, the code would be:
mkdir vagrant_demo --create directory
cd vagrant_demo --enter into the directory
vagrant init ubuntu/trusty64 --initiate vagrant operating system
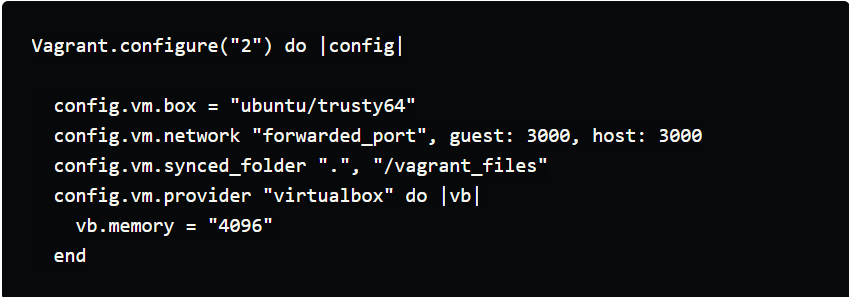
A VagrantFile, which explains the configuration of the vagrant environment, is created with that last command. Five specs in this file can be modified to suit your requirements. If no modifications are done, the default setup will be used.
-config.vm.box -- defining vagrant Operating System.
-config.vm.provider -- defining the base (Virtual Machine). With this command, you can also manipulate the number of CPUs used.
-config.vm.network -- defining IP address and ports of application. Rails applications usually default to port 3000. In our case, the host is our computer, and the guest is a virtual machine.
-config.vm.synced.folder -- defining how the guest accesses files in the host. Thus, the project files can be modified on your computer, and then they will be automatically synced to the virtual machine.
-config.vm.provision -- defining the virtual environment setup.
Thus, the final version of our vagrant file is as follows: