For some time, I wanted to write about remote package management in C#. So, I chose to start with this topic, by sharing my experience with setting up private, or local, NuGet repositories. To be able to follow the topic, basic C# knowledge is required, along with basic docker and Linux knowledge.
Package management is one of those mechanisms that developers take for granted. For the most part, development teams don’t argue about it or discuss it. Its beauty is the simplicity of the concept, coupled with the objectivity of its purpose, which is to provide extended functionality in an easy plug-in/plug-out sort of way. In OOP, package management is very helpful and without it, in most cases, one would not survive.
History behind package management
Looking back at the origins, the package management concept was first successfully applied by Linux, and its purpose was the same - install third party software. You can read some of the history behind package managers here - imagine the boredom behind having to restore dependencies from an FTP server, or browsing available software on it.
This was where developers saw they could easily add value. By having a readily available package manager that would sit beside the system package manager itself, most of the compatibility problems would be, in theory, easily approached, and could be solved before the distribution itself, by extensive testing and validation.
The C# use case
In this specific case, using .NET, I’m writing about the NuGet package manager, which has been the sideload of C# dependencies for a long time. This additional compatibility layer (if I may call it that) does a lot of the heavy lifting for the developer, without evident effort.
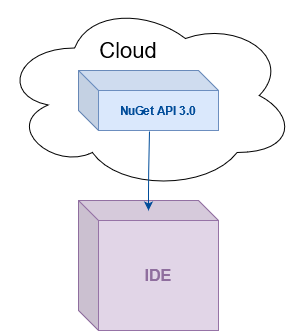
If the way packages are distributed internally could be customized inside a specific project, with hybrid sort of public and private hosting, to make it accessible and easily shareable across different solutions, by specific team members, this would — in theory — enable developers to produce and maintain a set of locally stored packages, which could then be interchangeably used by other colleagues.
Pre-requisites
To follow this segment, you will need to install on your machine:
- Docker;
- Sonatype Nexus Repository Manager 3 (docker Image);
- .NET SDK (includes runtime)
- Visual Studio (Code or 2017/2019/2022)
Setting up Sonatype Nexus 3
Open a command prompt and use docker image pull sonatype/nexus3 to retrieve the latest version of the docker image that will be used to launch the remote repository platform. When the image’s download is concluded, go ahead and create the volume that will be used to store data for the repository. If you don’t know what a data volume is, be sure to read about it on docker official documentation. This can be done with docker volume create --name nexus-data. By creating a volume, the application’s data will be persisted, even if the container is deleted. As per the official documentation on docker’s Sonatype Nexus 3’s official repository, the dedicated data path is /nexus-data: